We wrote about polishing headlights in the article Saab Headlight Restoration – how effective is it, how much does it cost… However, headlights can also be fixed in another way. It is about polymerization.
Polymerization of headlights refers to a process of restoring the clarity and shine of plastic headlights that have become hazy or yellowed due to exposure to UV light and environmental factors. This process involves removing the outer layer of the plastic, using various grits of sandpaper and polishing compounds, and then applying a protective coating to prevent future damage.
The process can be done using a do-it-yourself kit or by a professional detailer. A DIY kit typically costs between $20 to $50, while a professional detailing service can cost anywhere from $75 to $150 or more, depending on the extent of damage to the headlights and the location of the service.
Table of Contents
How to arrange the polymerization of headlights yourself
If you choose to do it yourself, you will need to purchase a kit that includes sandpaper, polishing compounds, and a protective coating. The process typically involves the following steps:
- Clean the headlights thoroughly using soap and water to remove any dirt or debris.
- Apply masking tape around the headlights to protect the surrounding paint and trim.
- Use a low-grit sandpaper (around 400 grit) to sand the surface of the headlights, being careful to sand evenly and avoid creating scratches or uneven spots.
- Repeat the sanding process with progressively higher-grit sandpaper (around 800, 1000, and 2000 grit) until the surface of the headlights is smooth and even.
- Apply a polishing compound to the surface of the headlights using a soft cloth, working in circular motions to buff out any remaining scratches or imperfections.
- Apply a protective coating to the surface of the headlights, following the instructions included with the kit.
It’s important to note that while DIY kits can be effective, they may not produce the same results as a professional detailing service. Additionally, improper sanding or polishing can damage the headlights or even cause them to become more hazy or scratched.
If you’re unsure about your ability to complete the process successfully, it may be worth considering a professional service instead.
What is the warranty on headlight polymerization?
It depends on who does the polymerization. In some service centers, they told us that the guarantee is 2 years, noting that they can give that much for the simple reason that they only do polymerization for that long.
They cannot guarantee for a longer period as they do not have enough feedback. Some services provide a 3-year warranty. Unofficially, many here and abroad claim that polymerization keeps the headlights in excellent condition for 3 to 5 years, which of course depends on how much the car is driven and in what conditions, where it is parked, etc.
Headlight polymerization and classic headlight polishing are two different methods of restoring the clarity and shine of plastic headlights. Each method has its own advantages and disadvantages.
Advantages and disadvantages compared to classic headlight polishing?
Advantages of Headlight Polymerization
- Longer-lasting: Headlight polymerization is typically more durable and longer-lasting than classic headlight polishing. The protective coating applied during the process helps to prevent future damage from UV exposure and environmental factors.
- Better clarity: Headlight polymerization can often produce a clearer and more transparent finish than classic headlight polishing.
- Professional finish: Professional detailing services that offer headlight polymerization typically have access to high-quality products and equipment, which can result in a more professional-looking finish.
Disadvantages of Headlight Polymerization
- Higher cost: Headlight polymerization typically costs more than classic headlight polishing, especially if done by a professional.
- Complex process: Headlight polymerization can be a complex process that requires specialized equipment and expertise. DIY kits may be available, but the process can still be challenging for beginners.
- Limited results: Headlight polymerization may not be effective for headlights that are severely damaged or have deep scratches or cracks.
Advantages of Classic Headlight Polishing
- Lower cost: Classic headlight polishing is typically less expensive than headlight polymerization, especially if done as a DIY project.
- Simple process: Classic headlight polishing can be a relatively simple process that requires basic tools and materials.
- Effective for minor damage: Classic headlight polishing can be effective for removing minor scratches, hazing, and discoloration from headlights.
Disadvantages of Classic Headlight Polishing
- Less durable: Classic headlight polishing may not be as durable as headlight polymerization, and the restored clarity and shine may not last as long.
- Limited effectiveness: Classic headlight polishing may not be effective for headlights that are severely damaged or have deep scratches or cracks.
- Potential for damage: Improper technique or use of the wrong tools or materials can potentially damage the headlights or create new scratches and imperfections.
What is the “Secret” of Polymerization?
The polymerization of headlights typically refers to the process by which the clear plastic lenses covering car headlights become cloudy or yellowed over time. This is not a chemical reaction, but rather a physical change that occurs as a result of prolonged exposure to ultraviolet (UV) radiation from the sun.
The plastic material used to make these lenses is typically polycarbonate, which is a thermoplastic polymer composed of repeating units of bisphenol A and phosgene. When exposed to UV radiation, the polymer chains in the plastic can break down and become fragmented, causing the material to lose its transparency and become discolored.
To prevent this from happening, many car manufacturers now apply a special protective coating to the surface of the headlight lenses. This coating acts as a barrier to UV radiation, helping to prevent the polymerization of the plastic and keeping the lenses clear and transparent for longer.
Polymer Vapor Polishing
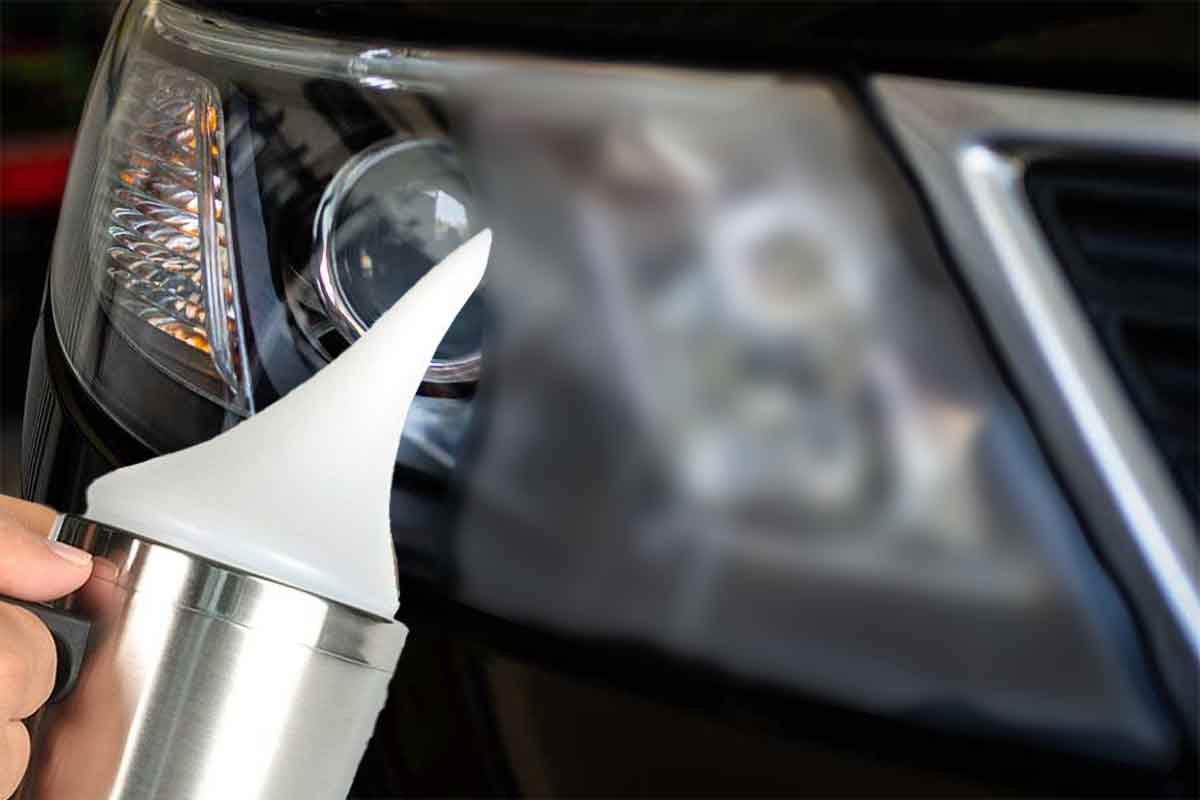
Polymer vapor polishing is a process that is sometimes used to restore the clarity and appearance of cloudy or yellowed headlights. This method involves using a specialized tool that sprays a fine mist of polymer vapor onto the surface of the headlight lens, which then reacts with the plastic to create a smooth, glossy finish.
During the polymer vapor polishing process, the headlight lens is first cleaned and prepared by sanding or buffing away any surface imperfections or discolorations. Once the lens is smooth and even, a polymer solution is heated to create a vapor that is then sprayed onto the surface of the lens using the specialized tool.
As the polymer vapor comes into contact with the surface of the plastic, it reacts with the material and begins to melt and smooth out any surface irregularities or imperfections. This process can help to restore the clarity and shine of the headlight lens, while also providing a protective layer that helps to prevent further damage from UV radiation.
One advantage of polymer vapor polishing is that it can be very effective at restoring severely damaged or discolored headlight lenses, often producing results that are comparable to those achieved through more expensive replacement or repair methods.
However, it’s important to note that this method can be more complex and time-consuming than other headlight restoration methods, and may require specialized equipment and expertise to perform effectively.


